
Prep time: 20 minutes, plus A LOT of inactive time (approx. 4+ hours rise, approx. 2 hour cooling)
Cook time: 1 hour
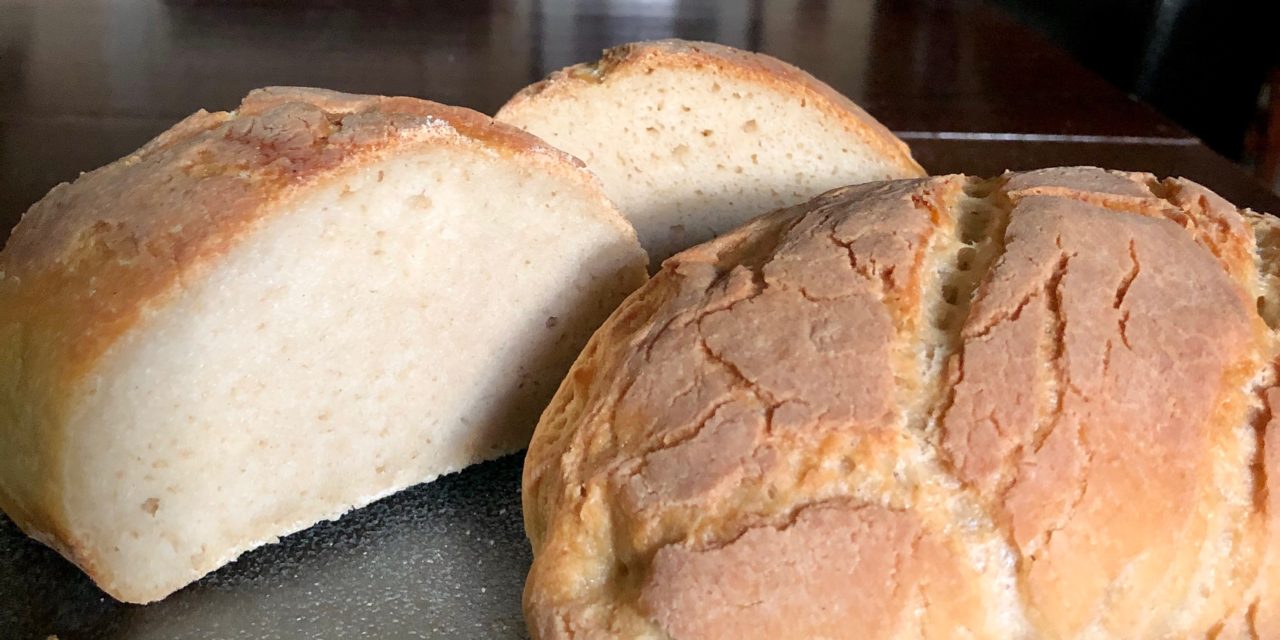
Yield: 2 small loaves
If you’ve baked gluten free bread before, you know how tricky it can be. There was a lot of trial and error in getting to this recipe and there is a lot of time involved, but it’s totally worth the time. There are just a few ingredients involved with this recipe. It doesn’t require eggs, baking soda, baking powder, etc. But it does require a little planning. For now, this is working really well for the 2 small loaves. I’m still working on tweaks for a version that will yield one large loaf but I’m not quite there yet. I’ll keep you posted.
Ingredients:
-
3 1/4 c All Purpose Gluten Free Flour – plus about 1/4 c more for dusting (I use Namaste Perfect Flour Blend which is a sweet brown rice flour, tapioca starch, brown rice flour, arrowroot powder, sorghum flour, xanthan gum blend – I get it from Costco. If you don’t have a store-bought blend that you like, there is an All Purpose Gluten Free Flour Blend recipe in this link.)
-
1 c GF Sourdough starter (Active starter, fed within previous 12 hours. Recipe in this link.)
-
1 1/2 c Warm Milk (just slightly warm, not hot)
-
4 tbsp Unsalted Butter, at room temperature
-
1 1/2 tbsp Sugar
-
1 tsp Salt
-
1/2 tsp Psyllium Husk Powder (You can omit this. But psyllium husk powder will add some moisture, texture and a hint of traditional flour taste to the bread. There are some substitutes in the notes.)
Directions:
- In a large bowl, place the GF flour, sugar, salt, and psyllium husk powder. Whisk to combine.
- Make a well in the center of the dry ingredients. Add milk and butter. Mix and knead together by hand until fully incorporated.
- Add starter. Work together by hand, squeezing the mixture until you no longer feel any lumps.
- When all lumps are smooth, start working the mixture into a ball. It will still be very tacky at first. Begin to sift small amounts of the dusting flour over and around the tacky dough ball and gently form it until the dough ball comes together without sticking to your fingers or to the surface of the bowl. Prep Tip: DO NOT add too much flour or your finished bread will be too dense.
- Take the dough ball out of the bowl and place it on a lightly floured surface to knead. Press it out with the ball of your hands, fold it up and press it out again several times (15-20 or so, you’ll know when it starts to feel right), sifting light amounts of flour if the dough starts to stick to your hand or to the surface. Form it into a smooth ball.
- Prep Tip: This step is optional but I HIGHLY recommend that you use the oven as the place where you let the bread rise and that you prep it at this point to create the best environment for that to happen. Your dough will need a warm, moist place to rise. Place a shallow tray of water on the bottom shelf of your oven as you preheat it to 350°. (This tray of water will remain in the oven through the first 30 mins of the baking time to help your bread rise during the baking process.) When the oven heats to temperature, leave the oven on for one minute, and then shut it off. (You’re not baking yet. You’re just creating a warm, moist environment for your dough to rise.)
- Transfer the dough ball to a clean bowl to allow it to rise. Cover the bowl with a warm, damp cheesecloth (or anything that will keep the moisture in) and place it in the prepped oven to rise for 4 hours. Prep Tip: Mist the inside of the oven with water to keep the environment warm and moist.
- When the the 4 hr rise time is up, remove the bowl of dough from the oven (keep it covered) and set it aside to continue to rise while your preheat your oven to 400°F. Prep Tip: I put my 9”x5” stoneware bread pans in the oven while the oven preheated. Doing this gives the dough a nice warm environment to be transferred to when the oven is ready. When the oven is preheated, remove the warmed bread pans from the oven. Note: If you’re not using a stoneware bread pan, lightly grease your standard 9” x 5” loaf pan and line with parchment paper.
- Gently cut your risen dough in half and gently transfer them to the 2 bread pans, gently reshaping the dough ball to an elongated oval with your hands as you transfer.
- After you transfer the dough, using a sharp knife, make two diagonal slashes across the top of the loaf (or a single slash from end to end).
- Place the pans in the center of the preheated oven, loosely cover the pans and bake for 30 minutes.
- Reduce the oven temp to 350°F, remove the cover from the pans (remove pan of water from the lower rack, if using), And rotate the pans 180°. Continue to bake for 35 mins. Note: The crust won’t be very dark, but the loaf should sound hollow when thumped quickly with a finger. If you’re unsure if your loaves are done, use an instant read thermometer. The center of your bread should read 205°F.
- Remove the pan from the oven and allow the bread to cool for about 10 minutes in the pan before transferring to a wire rack. Note: If the loaf is sticking to the surface of the pan, place the pan on its side for a few minutes, then gently pull it away from the side with your fingertips or with a spatula. Place the pan on the other side and do the same. It should release easily.
- Place the loaves on cooling rack for 2-3 hours until bread has cooled. It will be tempting to cut it right away because it smells AMAZING but cutting it too soon can result in too much moisture loss and can potentially collapse your bread.
I know there is a lot of waiting time in this recipe but the finished bread is SO worth the wait!!!
Enjoy!
Notes
Substitutes for psyllium husk powder include, ground flaxseed, ground chia seeds, xanthan gum, cornstarch, arrowroot powder, tapioca powder, or guar gum. You will use much less of the substitutes than you will of the psyllium husk powder but I had the best results with psyllium husk powder, and I recommend you use that if you can.
This dough will not fully double in volume during the rising process, but it will rise more in the oven. Sourdough takes longer to rise than types of bread so be patient. The age of your starter (and timing of when it was last fed) may affect the rise time. If you don’t think that the dough has risen enough, give it more rise time.
Related Recipes
GF Sourdough Starter Recipe
All Purpose Gluten Free Flour Blend Recipe
Storing
- To store the bread, I find that it works best to wrap it in parchment. Plastic bags trap moisture and can cause your loaf to go moldy fairly quickly.
- To freeze the bread, cool the loaf completely, slice, wrap tightly and freeze.


Recent Comments